Tuesday, October 21, 2008

moving on to beef

Today we made Boeuf Bourguignon (prep for day 4), Gratinee a l'Oignon, Filet de Boeuf, sauce Marchand de Vin, and Jardiniere de Legumes

We started off by preparing a marinade for a beef stew with red wine. More on this tomorrow.
Then we made onion soup. No surprise here, but you caramelize the onions and then add stock and simmer. Really simple. Right before service, toast the baguette slices and top with grated cheese - melt cheese and serve on top of soup. I could not stop snacking on the baguette. This might be chef sacrilage, but I don't really like Gruyere cheese. I think I might have eaten at least 5 slices of the baguette besides the three I toasted, but I only had a little bit of cheese. Bread. Carbs. So good.

Then we plated Filet de Boeuf, Sauce Marchand de Vin, and Jardiniere de Legumes. Wrap the tenderloin with bacon (barding) and sear both sides, then finish in the oven. Once it is cooked, set aside the beef, but use the pan to make the sauce out of red wine and veal stock. Blanch carrots, green beans, and turnips. Can you believe this is the first time I've had a turnip? In order to season vegetables, heavily salt the water - never season after they have been cooked.

Chef Z liked my vegetables - he said you can tell they're purposely placed, but they looked natural also. The stock tasted too much like stock instead of wine and stock (I had to put in extra stock because it had reduced without getting nappe). The vegetables and meat were properly cooked, but needed more seasoning.

I talked about politics with Chef T (from Garde Manger) in the dishroom tonight. I kind of thought he was a little dull originally, but the more I talk to him, the more interesting he is. He's quiet and clearly lonely, but he really enjoys politics. We talked about voting early, and I told him how Obama is doing election night here, and about Palin on SNL. Chef's very funny. I bet he'll write me a letter of rec for my externship if I asked him.

Lessons Learned:
The chefs really are right when they say everything tastes better with bacon. It's so true.
I'm starting to better understand the purpose of plating. I used to make fun of it, but I can see how it matters. And why you only put a tiny bit of sauce when you make more than a plate's worth.
I'm doing pretty well on the quizzes in this class - we've had one on soups and one on stocks and poultry. They're multiple choice, and he said the final will pull from them. But he does a decent job with his lecture - he doesn't really drift off-topic, so I have an easier time listening and remembering what he says.

Chicken, day 2

This day we made Soupe de Legumes (vegetable soup), Poulet Roti au Jus (chicken roasted in its own juice), and plated Magret de Canard, Sauce Bigarade, and Puree de Pommes de Terre.

This is a simple but tasty vegetable soup. I took the rest home to eat for lunch. Mine was a tiny bit oily because I used to much butter to soften the vegetables, but if I corrected that mistake, I would make this again.

To keep the roasted chicken moist, we made a compound butter that we spread under the skin and then roasted it with white wine and water.


The plated dish was sauteed duck breast with sauce and mashed potatoes. The sauce is a caramel-base degalzed with wine, vinegar, juice and zest, cooked until nappe and monter au beurre.

The errors I made on the plated dish were that it was messy (that should be obvious to you) and that I forgot to season the meat. Whoops. Always season your meat! But the mashed potatoes were amazing. Seriously. I wish I had made at least double. I love mashed potatoes. And I make good ones. Mmmm now I want them again.

Lessons Learned:
Have you ever had duck? It's really good. It's super-fatty, which is why it's so good. He said the dish normally is served with two breasts, but I just think that is way too much meat. One duck breast is plenty of protein in my opinion.
There are two main categories for soup: clear (broth/bouillion, vegetable, and consumme) and thick (veloute, cream, pureed, bisque, and chowder). When a restaurant is making soup for service, they prep in small batches and then reheat in small batches.

Beginning to cook real french meals

And so begins Intro to Culinary Skills II - where we begin to cook entire meals (starch, vegetable, and protein) in true French fashion. I prefer baking, but working so late around so much sugar can be hard. It makes my teeth hurt even to just breathe. I like making real meals that I can then sneak out of the kitchen to take home and have for lunch later in the week...

My initial thoughts are that I like Chef Z - he's nice, quiet, and a decent instructor. Tonight we started on chicken. Each night we will have to "plate" one dish - and it's up to us to use the rules of plating to figure out the best way to set it up. Then we get graded on the plating, flavor, consistency, cooking method, and general kitchen organization.

We made
Volaille Fermiere au Vinaigre


This is braised chicken in a vinegar sauce. Sear the chicken on both sides, then simmer, partially covered (about 2/3 up sides) with vinegar liquid mixture until tender. To determine if it is done during a "moist cooking process," never do a temperature check - if the meat is falling off the bone, it's tender.


Poulet Saute Chasseur plated with Nouilles au Beurre


This is just a sauteed chicken breast in tomato-based sauce on buttered noodled. Which, by the way, are amazing. We never ate buttered noodles growing up - just plain. Which I still love. But when you put just the right touch of butter and a nice dose of salt, it's just so good. Clearly I'm late to the buttered noodles game - I know other people have had it since childhood. I got a 38/40 on this dish - my noodles were a little too buttery (again, newbie!), so once I put the sauce on, it got a little oily.


Lessons Learned:
Searing tightens the protein strands on the outside and allows moisture to stay inside the protein.
So Rico and Whiskey cooked up this scheme to make T and Russia work at the tables at the front of the class in order to make it so they can't get away with working so slowly and never cleaning up for anyone but themselves. They made sure they got to class early, and had Country and Sutra set up at our table (it stands 8) - those 4, myself, Nemo, Tennessee, and Irish. We'll see how it works. I didn't really want to be at a table with Country and Sutra again - they are really frustrating to work near. Country is always running (literally running) to get stuff done, and is very sexist and condescending. I can get along with him, but I also don't hesitate to tell him when he is being condescending. And Sutra, well, I've told you before - he's creepy.

Thursday, October 16, 2008

Final Practical - a three day affair

Phew. We reach the end of Baking and Patisserie 2. While I love the work, and I ended up getting along with her individually, she wasn't exactly the friendliest. And I noticed that she doesn't even really pay attention - she is so used to yelling about certain things, it doesn't even matter if we are actually doing them - she yells anyway. It's like she's programmed to go off at certain points.


Oh! I finally figured out the macro setting on my camera, so I'm hoping my photos will look better. I hadn't been able to figure out how to do close-ups, but now I think I've got it.

For your pleasure, here my sweets are, up close and personal.

Carrot cake with marzipan carrot


Mexican Wedding Cookie


Fruit Tartlet


Brownie


Petit Four


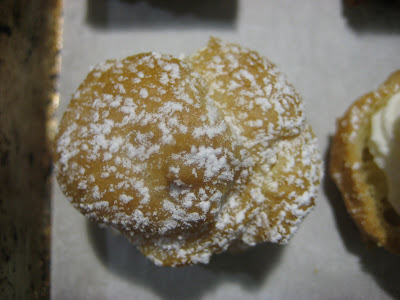
Puff Pastry


Madeleines


We also had to take a final, which I as usual did not study for. I think I may have pulled off a B.

For the practical, from what I remember, this is what she said.
The nuts for the mexican cookies were almost burned, but she liked it darker like that, but most customers wouldn't. She recommended that I taste my product even if I'm not much of a sweets person. Rico said again that my madeleines could be served at Starbucks - she said they are the exact color that they sell them. I got 22 -28 points on the treats, which was fine with me. By the third day, I was kind of done with the whole thing. I didn't really give much effort to the specific icing jobs.

Final thoughts:
All my chefs so far have told me "it's been a real pleasure" to have me in class when I go up for my final practical. I try to make an effort to talk to them, but it's not about sucking up - I actually really enjoy most of the chefs. Even the ones who shout. I'm a softie in the end. I really enjoy what I'm learning even if I don't plan on becoming a chef. Even with the late nights and how tired I am all the time these days, I love it. I'm going to be sad when it ends.
I learned a lot in this class - I really love this stuff. Even the details. I liked it better than the details for garde manger - it's just different for some reason.

Sorry for the delay with updating, everyone - I'm exhausted and my weekends have been really busy. I don't really have time to keep up with the posts. I'll get there.

Mini Treats

On Day 11, we made brownies and chocolate tartlets. Chef says that if it is a complicated recipe, it won't make a good brownie - you should be able to mix it by hand. These were really good, so I'd say she is correct.

Brownies
Melt cocoa with butter, stir in sugar, vanilla and salt. Stir in eggs. Stir in dry, just enough to bring together.
Here's where I got pissed off: she had written the recipe on the whiteboard because she didn't like the one in the packet. And right next to the temperature, she has down "45-60 min." Which seems odd, once you think about it, right? When do brownies ever bake for that long. But I didn't question it because it was on the board - you'd figure the chef would write her recipe correctly, right? Anyway, she starts yelling at us to check our brownies at after 20 minutes, and mine are totally and completely hard. And I look at the whiteboard, and loandbehold, the "45-60" has been erased - I can still see it, but it's clearly been erased. And she continues to yell at us for not checking our brownies. Now, okay, that's correct - we should be checking them. But if the recipe tells you 45-60 minutes, you don't start checking until around 40 min. Unbelievable! And how immature for her not to admit that she screwed up, but instead just erased what she had written up there.
Whatever.
Since we were going to be able to use these for the final practical, I made them again another day.

Tartlets.
Huh. I apparently did not take photos this day. Well, they were really cute. You'll see a fruit one for the final practical. Make pate sucree, and roll out to fit 10 tartlet pans. Put together (I prefer a bowling pin formation), and lay out the pate sucree over. Press into pans, then par-bake. See baking I for those instructions. I used the chocolate tart filling because, well, it had the least ingredients. It tasted really good in the end - you think it's going to be hard because of the cracked crust on top, but it was moist and sweet on the inside.
But here's what I made for the practical on Day 10:
I got a 54/60 on the creme caramel - there were some bubbles in the batter and I broke one when I tried to get it to flip over.
59/60 on the Mexican wedding cookies - I do really well on these. She said I hard really good color, nice dipping, and the flavor was right. Oh, but as you can see, I had one runt - so that was the lost point.
60/60 on the Devil's Food Cake. She said this was done perfectly. It was the right thickness, and excellent flavor. Here's what it looked like when she cut off the top:


You want to eat it, don't you? Well, invite me over to your kitchen with a real oven and I'm happy to make you one!

Lessons Learned:
If the time doesn't look right, challenge it. And accept that even chefs make mistakes, so it's okay if you do as a student.

Monday, October 13, 2008

Icing for Cakes!

Now, here's the thing people should know about me. I love my canned icing. That stuff is fantastic. You can just eat it right out of the can. With a spoon. After spoonful after spoonful. Well, not anymore because of how sensitive my teeth, but I still daydream about it. And then it's a little bit hard but yet smooth...so good.
I've never liked the icing that comes on cakes that are bought. I mean, fine, I'll eat it, but it's way too sugary for me.
So Chef had a hard sell in me. But now I get it. She said the stuff I've eaten is probably Jewel cakes, and what they call buttercream isn't buttercream as chefs know it. Alright, she wins. But I'll still happily eat my betty crocker vanilla icing.

Italian Buttercream
Heat sugar and water to 240 degrees (soft-ball stage). Soft-ball stage: stick an ice-cold hand (or, really, because that takes years of baking and burning your hands to get those callouses, stick in a metal spoon) into the boiling sugar and immediately into an ice bath, where you see if you can form a ball - if you can, turn off heat, and immediately pour the sugar down the side of the mixer. BUT. While you're heating the sugar, whip egg whites into soft peaks. Don't pour the sugar until the eggs are at this stage, and don't pour any on the paddle attachment! Continue whipping on high speed till mixture is completely cool. Once cooled, gradually whip in softened butter in clumps. Add lemon juice and vanilla extract. Then we bagged and cooled.

Make lemon curd. Unfortunately, I have misplaced this recipe, so couldn't tell you exactly how it was done. It's made on the stovetop - so heat a lot of lemon juice with cornstarch? Ha. I'll get back to you on that. So what's happening in these steps is that I'm putting together the chiffon cake. First, cut it into two or three layers, depending on height. Make a border of buttercream, then fill in with lemon curd. Imitate at each layer.

This is the finished product:

lay down a layer of "crumb coat." This protects the final layer from having any crumbs on it. Theoretically. I was a little messy this day. But's that's all about practice makes perfect. Cool in between crumb coat and final layer of icing. Then cool again, and make indentations with back of knife for slices. Make a rosette for each piece and a tiny dot of lemon curd. What goes on top should indicate the flavoring inside. That crumb edge covers up the harder parts to ice - bakers have their tricks! I can't remember exactly what it is called.


Ganache
Shoot. I'm clearly missing a page out of my recipe packet. Melt some chocolate and pour over the leveled devil's food cake.
Oh, to level a cake, cut top to make even, then flip the cake to make the bottom the top: this way you guarantee you have a flat top since the pan you baked the cake in theoretically should have a flat bottom.

Pour the ganache evenly and quickly, making sure to cover all side. Use an offset spatula to smooth the top. Move the cake around the rack so no "feet" form at the bottom of the cake.

Marzipan.
Paddle almond paste and corn syrup together till well icorporated. Add in sifted powdered sugar and blend very well. This covers the almond cake.
Wait, I'll back up. First, slice the almond cake in half. Cover with a thin layer of apricot jam. Then lay down top layer. Cover with rolled out marzipan. Cut with bisquit cutters into desired size. As you can see, my cake is a little uneven and would never do for a formal event. But I think they're kind of cute all lopsided! These will be covered with a layer of poured fondant and then roses will be created on top. I had a photo, I thought.


Lessons Learned:
Seriously love this. It is so much fun! I think if there weren't so much time pressure, it would be even better. And I know with more practice I can do an even better job. I could see doing this for an externship - helping out at a catering company or under a patisserie in a restaurant.

Cakes!

Tuesday we made Devil's Food Cake, Almond Cake, Carrot Cake, and Chiffon Cake.

Chiffon Cake:

This uses the Chiffon method. Sift together cake flour, sugar, salt and baking powder. Combine oil, yolks, water, and extract - whisk. Making a well in the center of the dry ingredients, add wet ingredients and stir well, without over-mixing. Stir in lemon zest (if using). Whip egg whites to soft peaks; add in sugar and cream of tartar and continue whipping to form firm, moist peaks. Fold meringue into cake batter. Pour into parchment lined, ungreased 2 8" cake pans, filling only 2/3 of the way. When done baking, line rack with parchment, place on top of cake, and flip over - this flattens top and it won't sink further.
You'll see what we do with this in the next post...

Devil's Food Cake:


Mmmmm. Devil's food cake. This. Was. Amazing. Use the creaming method (you know what that is by now, right?). The most important step for this one is not to overmix once you've added the cocoa paste (which is just warm water and cocoa powder - nothing fancy). Don't worry if some of the flour isn't completely mixed in - scrape it down and stop the mixer. Use parchment and spray sides and bottom. Don't you wish you could have been there to smell this? I am not a huge chocolate person, but I think I could have just sat in a room filled with this smell.
Almond Cake:
Creaming method. If it starts to break when adding the eggs, just add a tiny bit of flour. Once all 12 eggs have been added (in three batches), fold in dry ingredients. Parchment line and spray pans. Spread with an offset spatula and pinch edge away from pan. Ha. This one was clearly too thin on one edge - I gave it to Master to work with, because if I do three out of four cakes, why should I get stuck with the burned one? Especially when she is very open that she doesn't care.
Carrot Cake:
This uses the two-step method - mix wet, mix dry, then mix together. Pretty simple. Irish says she has a much better recipe, but this tasted pretty good to me. Apparently her's has pineapple in it.


Lessons Learned:
Oh my goodness does chocolate cake smell amazing. And I like baking cakes! I really think I am going to have to go out and buy myself these different flours - I tried to make chocolate chip cookies at home but only using all-purpose, and they definitely did not turn out as well as the batch I made in class. Now, I also have a sucky 2/3 oven, but still. And I really want a kitchen-aid. But that's silly until I have an actual kitchen.

Fancy Desserts

Monday we made Creme Brulee, Creme Caramel, cheesecake, and souffle.

Creme Brulee:

Whip together egg yoks, sugar, vanilla, and salt. Scald heavy cream in a pot, gradually whisk into yolk mixture. Be careful when you do this - you don't want bubbles floating on the surface. If there are, you can pull them out withh a paper towel. Fill ramekins to the top and bake at 300 in a bain marie (water bath). Bake until set in center - shake to make sure it doesn't jiggle. Cool. Remove from cooler and spread a thin layer of sugar on top. Caramelize with torch in an even, steady movement, being careful not to scorch the sugar, which will create a bitter taste.

Creme Caramel:
Pour 1/4" layer of caramelized sugar into prepared ramekins. (I will explain how to make this on my practical day - Master made the creme caramel this day). Whisk eggs and sugar together. Scald milk and gradually mix into egg mixture. Stir in salt and vanilla. Use the same tactic as with the brulee to get rid of bubbles. Pour custard base into ramekins (once caramel is completely set) and bake at 300 in bain marie till custard is set in the middle. Allow to cool. Using a paring knife, separate custard edge from sides of ramekins and invert onto serving dish.

Cheesecake
We made a flat cheesecake - this is how they do it in catering and restaurants in order to cut out bite-sized pieces. Fancy restaurants of course do not serve gigantic triangle slices - having never been to one, I can't vouch for this, but I've seen photos...

Make a graham cracker crust out of a combination of graham cracker crumbs, butter, and sugar. Bake for about 8 minutes.
Paddle cream cheese until lump free (must be completely lump free!), then add sugar till smooth, then bread flour until smooth. Add eggs and yolks a little at a time, incorporating well after each addition. Scrape well between additions and afterwards. Add in cream, sour cream, and vanilla extract. Blend well. Pour over crust. Bake.

Now, to do what I have on top, those are different step.
From left to right:
Before cooking the cheesecake, draw thin lines with thinned out jam or chocolate. Then pull the paring knife gently down through the lines all the way down. In-between those lines, pull the paring knife in the opposite direction.
Marbeling, drop dots of color in a random formation. Take your paring knife and gently swirl the dots.
Hearts, drop dots of color in order. Pull your paring knife through the dots in one direction.

Souffle
Combine bread flour and butter to form a paste. Combine milk and sugar, bring to a boil then remove from heat. Temper a portion of the hot liquid into the flour/butter mixture, and then add all of this back into the pot. Beat vigorously to ensure there are no lumps. Return mixture to the heat and bring it to a boil, beating constantly. Allow to simmer for several minutes until it is thick and no starchy taste remains. Tranfer to mixing bowl, cover and cool 10 minutes. Beat in egg yolks and vanilla.
Prepare souffle dishes by buttering and dusting interiors of ramekins.
Prepare meringue, whipping to soft peaks and then add sugar, whipping until firm and moist. Fold meringue into souffle base, 1/3 at a time.
Portion into ramekins. Flatten top with offset spatula and clean the edges (pinch edge between thumb and forefinger - circle the edge). bake for about 15 minutes for small dishes.
This is a sweet souffle - other flavors are chocolate, lemon and coffee.
Clearly, these are supposed to rise straight, but we were kind of rushed. We just barely got them in on time - Chef kept shouting if we didn't have them in the oven, not to bother, but I refuse to listen to that. As far as I could calculate, we had just enough time to have them in the oven and clean out space, and pull them out right before class ended. I was right, but clearly we messed up on something.
But she said they looked good on the inside. I sampled the tiniest bit, but really could not stomach any more sweetness.


Lessons Learned:
I lost track and almost ruined my cheesecake, but it turned out okay! I've made a lot of cheesecake for my boyfriend in college, but never this way. I also like this recipe better.
Also, people always think souffles are really hard, but you should expect them to start to fall almost as soon as they come out of the oven. In kitchens, the saying is, "people wait for souffles, not the other way around."

Friday, October 10, 2008

Dessert Presentation

Friday night we worked on plating desserts. We learned how to make tuile and sabayon.

To make tuile cream butter and powdered sugar, then paddle in egg whites, cake flour, and vanilla. Bake in 2-3 piece batches for about 3 minutes in a 300 degree oven. Must be shaped while hot - lay over a cup or a rolling pin, or shape in some other way. You can also spread it onto a silpat; this is called "marbeling."

Chocolate Mousse: This was my first and second one. The cookie you see sticking out is tuile.

Bavarian Cream:

I really liked my last one, but she pointed out, which made sense, that you don't want to tilt the bavarian cream because the fold makes it unattractive. But otherwise she said I had good ideas.

Lessons Learned:
Plating is fun, but I don't know that I have the best eye for it. I love art, but I don't have any training beyond junior high and photo in college.
I really enjoyed this activity - it's making me think I might be able to do my externship either in a restaurant under a pastry chef or a catering company.

Friday, October 3, 2008

Perishable Pastry

Thursday we made mousse, bavarian cream, ice cream and sorbet. Master and I both like lemon, so we made lemon sorbet. I had to almost double the amount of simple syrup before the baume would read solidly at 15. It's supposed to be at 16.


Master and I made a lemon sorbet. Combine lemon juice with simple syrup. Test in baume - a measuring device to determine how much density there is to sugar syrup. 11-14 intermezzo, 15-18 dessert sorbet (16 is the best reading), 20 cloyingly sweet and won't set up. I could not get it to move from 15, no matter how many times I poured in more simple syrup. I gave up after about 10 minutes - I figured I prefer the tartness of lemon, so I didn't need to keep making it sweeter. Process through an ice-cream machine.
We also made vanilla ice cream. Scald milk, whisk yolks and sugar in a medium bowl, then gradually temper hot liquid into yolk mixture. Whisk well and return to the pot. Using a wooden spoon, stir until the mixture thickens enough to coat the back of a spoon. Pour through chinois into clean bowl over ice, then pour in vanilla and cream. Process through an ice cream machine, after resting overnight.
To make chocolate mousse, melt bittersweet chocolate with butter over bain marie (bowl over boiled water - heat turned off), then whisk in yolks. in a separate bowl, whip egg whites with sugar to medium soft peaks. Fold into chocolate mixture. Whip cream separately to soft peaks, then fold into mousse. We stored these in ruber molds refrigerated overnight.
To make fruit bavarian, combine fruit puree (any kind), sugar and lemon juice. Bloom gelatin in water and allow to sit for 5 minutes. Warm over bain marie until gelatin granules are completely dissolved. Stir melted gelatin into puree mixture. Whip heavy cream to medium peaks and fold into puree/gelatin mixture. We also poured these into rubber molds and refrigerated overnight.
Lessons Learned:
It's really easy to make these frozen desserts by yourself, but you just need to buy a good ice cream machine. The hardest thing with mousse and bavarian cream is the folding: put one third of whatever you are folding in in with the whipped eggs, then cut down the center and move the spatula under to the left and fold the mixture over. Keep doing this, turning the bowl around as you go.
These will be plated - get excited!

Thursday, October 2, 2008

Puff Pastry

Wednesday we started off with a quiz - weights and measures. I'm really glad we had to memorize this - I think it's really good to know without having to always check references. She did throw in some curveballs by making us do real math. We had to figure out how many ounces are in 3/4 cup, how many cups 8 T makes, and how many tablespoons are in 1 pound.
Just in case you're curious,
1T = 1/2 oz = 3t
2 cups = 1 pint = 16 oz
2 pints = 1 quart
2 quarts = 0.5 gallon
4 quarts = 1 gallon


We finished off the eclairs with chocolate fondant, dripping chocolate, powdered sugar, and almonds. To cut open the rounds, cut with a serrated knife, turning the pastry underneath your palm as you cut. This way you won't cut your hand and you won't break the pastry.


To make chocolate fondant, warm the fondant, stir in melted chocolate and simple syrup to make a smooth and creamy consistency. No one makes fondant from scratch - you have to buy it ready made. Some classmates told me you can find it online.

To make caramel, cover sugar with water and 2 oz of corn syrup in a pot, making sure there is no sugar on the sides - this will cause it to cede and ruin the whole batch. Put it on heat, and don't touch! Wipe down the sides with a wet pastry brush, making sure not to touch the boiling water. Cook to a medium amber color.

Fill the puffs with pastry cream in base, even with top, then dust with powdered sugar. To fill eclairs, poke two holes in the bottom, and pipe in creme chantilly. For the Paris Brest, pipe diplomat creme with a star tip, then drip chocolate, put down almonds (always an uneven number), and dust with powdered sugar. For the caramel, poke hole in the bottom, dip in, allow to harden upside down, and once cool, pipe in creme.


I love eclairs - and these turned out really well. They were a childhood treat, my dad would bring them home and they would be in the freezer - I would eat them after microwaving 10 seconds to soften the creme but keeping it cold. So tasty!

In order to clean the caramel pots (never, never pour this down a drain - you will pay a lot of money for a plumber), pour water to cover and then put on the heat. Once all of it becomes liquid again (including the bottom), pour hot down the drain. We had about six pots going, one by one finishing. The last one won't finish! Chef yells at us, twice, and finally tells us we will pay penalty points the next day. I want to point out that it's only 11:30 and technically class ends at 11:45, or that by yelling at us, she makes me want to dump the unclean pot under clean ones in the dish room and ditch it for someone else to deal with. Right after she threatened the penalty and walked out, the pot was finished and actually clean.

Lessons learned:
Start cleaning caramel early - it takes a really long time to finish.

Wednesday, October 1, 2008

Cookies, continued

Tuesday we made pate a choux and pastry cream (praline and vanilla). Brief lecture to begin again.
Pate a choux is a a tasteless batter that is piped and filled with pastry cream. You can tell the batter is done when it looks like stalagmites and stalagtites connected in caves.


Combine water, butter, andd salt in a pot and bring to rolling boil until the butter is completely dissolved. Add flour at once, stirring vigorously until the dough pulls away from the sides of the pan (about 10 minutes, your arm will hurt). Mix on moderate speed with a paddle attachment until dough cools below 140. Beat in the eggs, one at a time until fully absorbed. Will be piped into rounds, Paris Brest (logs), or eclairs.


I was way more on time today - I got done plenty early with my mixing, and then the baking took way longer than to be expected. You're supposed to do about 15 minutes at 425 and then 5 at 375 to brown. You know it's done at the first oven when you can press on it and they don't collapse under your finger. Mine took at least 25 minutes. Probably because people were in and out of the ovens since I was the first in.


Took home some mexican wedding cookies and biscotti to give to a couple people at work.
Lessons Learned:
Practicing piping is important. Chef may not be the friendliest, but she really does help. She showed me how to stop at the end of the cookie, and then pull back up or roll around the edge so there is no tail.

Baking and Patisserie 2

Monday we began cookies. Things weren't really going well. Master and I partnered up. The night started with a lecture - some girl in the bathroom called Chef L a "nazi" - which, I hate that word. But then I pointed out to Master that we've both seen that girl out in the hall during class on the phone, so no wonder she failed the class twice - Chef L is really strict about the rules. But. We get out around 11:30.

Anyway we made madeleines, three versions of mexican wedding cookies, and biscotti. I don't know why, but I felt majorly rushed - I felt like I was way behind. We screwed up the madeleine twice - first time mixing the eggs in right away, and then the next the butter wasn't soft enough. But the third time, the batch turned out well.

But by that time, I was having these chest pains that were freaking me out. I was bent over trying to breathe while still putting together ingredients.
Mexican wedding cookies:
sift confectioner's sugar, then cream butter and sugar.
add pastry flour, vanilla extract, and chopped nuts to creaming mixture.
3 shapes: small ball, small ball rolled in nuts then thumbprint for filling, and icebox (log 1.25 inches in diameter) then slice thin.

They got dipped the next day: some in chocolate, the rounder version in powdered sugar as soon as it came out. This isn't our dipped tray - I accidentally dipped the madeleines in the wrong side. Oh well.


Lessons Learned:
We learned how to make paper cones for dripping chocolate our of parchment paper. This works really well for a thin drip. Fold the parchment to make two triangles (kind of like starting an origami crane). Then cut the triangle in half. Grab with two fingers along the hypotenuse, fold one corner into the tip. Roll the other side around, then shuffle your fingers to make the tip sharp as a point. You should be able to fill the cone without any water dripping out. Fill with chocolate, then cut the tip enough to drip out the chocolate.